Showing posts with label tips. Show all posts

Chalkboard Wall In The Home


A chalkboard wall is something I've always wanted in my home, a little piece of old school to make my home unique, fun and welcoming. There are plenty of great places to put a chalkboard wall, your kid's room of course is on top of the list, but for me the chalkboard wall took place in the kitchen. A bare awkward wall was painted over with a few coats of chalkboard paint (purchased at Home Depot) and in a few days I had a chalkboard wall to write my shopping list, reminders, planned menus, notes and such. I absolutely love it! And I'm sure my son, when he is old enough, will love it too.


Was it hard to paint the chalkboard wall? No, not really but it does take more than splashing it on the wall. Chalkboard paint is sold at Home Depot, I merely picked the chalkboard paint and brought it home. Here's a few helpful tips I've learned while painting the chalkboard wall...

1. If you want a smooth surface chalkboard wall you'll need to pick a wall with a smooth surface. Unsurprisingly the chalkboard paint will not smooth out any bumps for you. My kitchen wall has a slightly bumpy texture so naturally the final result came out well, a little bumpy. This can be seen more so when written on, it's not all too bad but still, if I was to do it over again I'd probably do it on a smooth wall.

2. When the directions say "sand the wall", SAND THE WALL! Especially if you have a glossy finished wall you are planning to paint over.

3. Don't be afraid to do more than two coats just remember to wait the specified amount of time to let it dry before painting your additional coats. I did three coats.

4. Purchase the appropriate roller! A roller specifically for a smooth finish is what you're going to need to get this done right. I bought a couple of rollers and used a new roller for each coat that I did, just in case. The chalkboard paint specified which roller I would need- this made it loads easier!

5. Don't freak out if you've found that your chalkboard paint has bled just a little bit past your taped off edges, you can always do a trim or a molding around the chalkboard which will probably only make it that much more beautiful.

6. Slowly and carefully remove your tape from the taped off edges. The chalkboard paint I used is latex so when it dried and hardened I was careful to remove the tape off the edges as I was afraid it would peel or lift the paint off the wall.

7. The type of chalkboard eraser you use is a factor. What? I know right! I thought all erasers were made equal, apparently not, just ask a fellow teacher. I'm not too sure if I got a good chalkboard eraser but it was reviewed pretty highly on amazon compared to all the others.


Item Of Note: Ikea's affordable Hemnes 3-drawer dresser


Up until recently I was using a kitchen island as a counter top in my bathroom and for awhile I had noticed how cluttered and messy the bathroom was looking due to the towels and things on the exposed shelving on the lower part of the kitchen island. Had I not had so many items and so many different colored and differently designed towels perhaps the exposed shelving of the kitchen island may not have ended up looking so untidy. I purchased a 3-drawer dresser in a red stain (the Hemnes 3-drawer dresser from Ikea) as a way to clean up the look of the bathroom and get it to look the way I wanted it which is tidy, eclectic and charming.

The Fine Line When It Comes To Open Shelving


Open shelving is not only great if you are looking to add a bit charm into a space but is also convenient, no opening of cabinet doors or drawers is needed, simply reach over and grab. Of course this also means that everything on the shelves are exposed to all eyes. One may presume that keeping their open shelving will be quite simple because they are in fact a very tidy person- this is what I thought, but I quickly learned that there are a few things that can make open shelving belonging to the tidiest of people, cluttery and messy looking. And so, while I am a huge fan of open shelving and use it in my home almost wherever I can, the cluttery mess that can come with it is a very real issue, there is a fine line between neat & charming and just downright messy. Here are a few pointers on how to pull off and what to stay away from when considering open shelving for a space in your home.
Cozy Dining-Rooms


You may opt for a formal dining-room, but if you're anything like me you will probably feel most comfortable in a not-so-formal one. Formal dining-rooms are very beautiful but the pressure to sit-up straight as a stick, to not have a finger or elbow out of place and to eat with formal dining etiquette (this fork for this, that fork for that) can be a bit much for my digestion. My idea of a dinner party is, close friends, dim lights, a quiet chatter or even, dare I say, gossip. Reaching over the table for hot bread buns, a shared dish of butter... this is what I see for a dinner party in my home. And for a dinner party like this, or for any dinner like this for that matter, one will need a comfortable, cozy and friendly atmosphere.

A FEW ATTRIBUTES TO MAKING IT COZY

FIREPLACE... Add warmth, now that's cozy

Maybe it is because we envision winter time when we see a fireplace that make us feel so comforted; sitting around a fire during a storm reading a book with a cup of hot chocolate while we wear our most warm and comfortable.


DINING-ROOM FURNITURE... That isn't exactly dining-room material can be cozy

A large dresser drawer there and a table lamp here, all on a beautiful arabian rug can exude an atmosphere that makes diners feel that it is okay to 'let go'. "Forget formal dining etiquette" it might say.


THE LOVE SEAT... Cozy for two, cozy for all

Adding other non-traditional seating, such as a love seat is probably one of the most simplest ways to transform your dining area into a cozy one.


THE FRIENDLY CHALKBOARD... a casualness that comforts by saying "you'll be okay here"

Perhaps it is reminiscent of our childhood that makes chalkboards so friendly and warm, remember your 2nd grade classroom? The room with its colorful tightly knit carpet, games and toys off in one corner, colorful 2nd grades drawings all over the wall, and in the corner a little alcove where one had cubbies and hooks to put their belongings... and of course at center, the chalkboard.


ALCOVE SEATING... Snug

The bench seating that goes around the table reminds us of alcove dining areas that are dimly lit and comfortable with its cushions and throw pillows. Cozy.


AMBIENCE... It's just cozy

Keeping it casual is the best way to keep it inviting, thus, cozy.


I Stand Behind: Attic Insulations


It's been a year since my husband and I moved into our very first home, a century old, one story, 1400 square foot home with wall gas-heaters and no central air. If there is anything we have learned in this one year of owning our home it is that in the summer it is best to spend days in the nicely air-conditioned mall or perhaps even go for a nice long grocery store run in the freezer section, let's just say, if it's sweltering outside you don't even want to know what it's like inside. And during the winter thank the good lord for sweaters, sweaters and more sweaters not to mention layers of down-comforters and knit socks, let's just say "ice box" to keep it simple. And from a year of temperature agony what have we learned? Insulation is damn important!

During the winter our wall gas-heaters barely worked at all in keeping the house warm, because our house was not well insulated (minuscule cracks and gaps around windows, outlets, light switches, doors, including no attic insulation) kept the house from trapping in the heat, and thus we were running our gas wall-heaters 24/7 which comes out to many $$$$s.

During the summer, before we were blessed with the knowledge of Texas Summer (a strategy by which to keep your house cool for as long as possible without running the A/C), if it was 103 degrees outside you can bet it was just as hot, if not more, inside. Without the attic insulation to separate the rest of the house from the heat in the attic meant that the heat radiating from the attic to inside the home was keeping the house unbearably hot during the summer heat.


This was a problem we could not even stand to think about baring every year, so we got to work on insulating. We began by taping up those minuscule cracks and gaps around windows, light switches, outlets, fireplace, doors and such. Unfortunately this did very little to help, there's just no way of getting every crack and gap in the house and of course insulating these areas just wasn't the key to making a marked difference in temperature.

So we decided to go with attic insulation, this took the workers 2 hours of pumping recycled insulation to cover our entire attic floor with a thick layer of what looked like puffy clouds. Within the next two days I was able to see a marked difference in the temperature of our home. We no longer lived in an ice-box during winter nights and mornings, and the daytime temperature of the house was no longer sweltering on warm-to-hot days outside. On sunny days I simply draw the curtains to block out the light of the sun and the house becomes instantly cooler. On cold nights I run the gas wall-heater for a hour to feel comfortably warm opposed to all night or all day as I had done before to no avail.

Further insulation research I've done have resulted in the knowledge that attic insulation can cool the house up to 10 degrees! Not only have I been basking in attic insulation delight with our better regulated home temperature but have seen a difference in gas bills which sky-rocketed during winter, no longer having to run our gas wall-haters unnecessarily long means of course, smaller gas bills.  And I'm sure if we had central air those electric bills would also be smaller as well. In a perfect world your home would be 100% insulated- I'm not even sure if that is possible, but if you have to choose a form of insulation... I stand behind attic insulation, it will make the most noticeable difference.


Feng Shui 101: Basic tips


What is Feng-Shui?

Feng: Wind + Shui: Water = Feng Shui = Wind Water

Feng shui is an ancient art and science developed over 3,000 years ago in China. It is a complex body of knowledge that reveals how to balance the energies of any given space to assure health and good fortune for people inhabiting it.  -About.com


Feng Shui for beginners: The basics for a quick start on creating better energy for your home

1. De-clutter Your Home, an important step in creating a harmonious feel to your abode. Out goes everything you do not love or need. This process can be time-consuming if you've picked up the habit of saving everything, but with a little bit of patience, a good pace and your favorite music playing in the background de-cluttering can be therapeutic. The whole idea is to "lighten the load".


2. Fresh Air & Natural Light, an important step for good chi (the universal energy that permeates in everything around us) including your abode. Open the windows and the blinds! Let the fresh air and the sunlight in. Very much the same way a good walk can help us recharge and feel positive, allowing fresh air to circulate in your home and natural sunlight to brighten the inside of your home will have the same affect.


3. Define the Bagua, which is also known as the 'feng shui energy map' of your home. Knowing the bagua to your home will help you to know which areas of your home can be altered in order to achieve success in certain parts of your life (ie. health, money, love and etc.) There are two different ways to define the bagua of your home, the simplest way (I found) was to define the bagua by using the Western (BTB Feng Shui) method; you will need a floor plan of your home, paper (tracing paper is ideal) and a pencil. Create a grid with nine squares (or rectangles) that will fit over your home floor plan (the grid will consist of three boxes in each three rows equalling out to nine squares or rectangles). Align the lower row of your gird with the wall of your main door.

In the first row (the lower part of the grid, from left to right):
Personal Growth & Cultivation, Career/Path in life, Helpful People/Blessings < since the grid is always aligned with the wall of the front door, your front door will be in either of the three areas listed above.

Second row (middle row, from left to right):
Health/Family, Center/Heart/Yin Yang, Children/Creativity

Third row (the uppermost row, from left to right):
Prosperity/Abundance, Fame/Reputation, Love/Marriage

Once you know which areas of your home are connected to which areas of your life you can then in more detail feng shui rooms where needed.


4. The 5 Elements & Corresponding Colors, placing the correct colors in the correct places can strengthen and balance the energy of your home. The five feng shui elements and their colors are:

For the element: Wood use Green, Brown
For the element: Fire use Red, Strong Yellow, Orange, Purple, Pink
For the element: Earth use Light Yellow, Sandy/Earthy, Light Brown
For the element: Metal use White, Gray
For the element: Water use Blue, Black

The 5 elements and the corresponding color is a subject that would need further exploration as the teachings are in depth. However, for beginners you may want to keep it simple and take into note these tips when trying to utilize the 5 elements and colors:

Green = improving health and balancing family life
Blue = career growth
Strong yellow = good times
Pure White = creativity

Simply introducing these colors into specific areas of your home are not good enough, remember that the room and home as a whole need to connect harmoniously together as well, this includes making it work with other decor items, art pieces, furnishings and etc.

Using your bagua (the feng shui energy map of your home) place colors as needed in specific rooms.


6. Most importantly, feel your home. How do you feel in your own home? Comfortable? Relaxed? At peace? Or do you feel somethings amiss? Not quite right? Does the placement of the sofa to everything else in the home make you feel uncomfortable when sitting on the sofa? These are all good things to keep in mind. Pay even closer attention to the rooms you will spend the most time in, these tend to be the bedroom, bathroom and kitchen.


*For more interesting & helpful information on Feng Shui check out About.com


I Stand Behind: Re-using jars and bottles


I have a collection of glass jars and bottles that I've been collecting from finished pickles, capers, juices and things. It all began with a wedding, my wedding, I was set on having a romantic country-style wedding, I envisioned a long table topped with white wild flowers in various jars, so I began collecting jars... and it never stopped. I found that when you took off the label and thoroughly wash the jar of residue and scent that they are absolutely charming and very helpful in storing beans, seeds, grains, pickles, preserves and etc. Of course your husband, as my husband has, can be very appreciative when he finds that you've got plenty of jars to spare so that he has a great way to organize all his little nails, and knick and knacks from the garage. Jars? There definitely a good thing.


The Studio Apartment that reaches for new heights


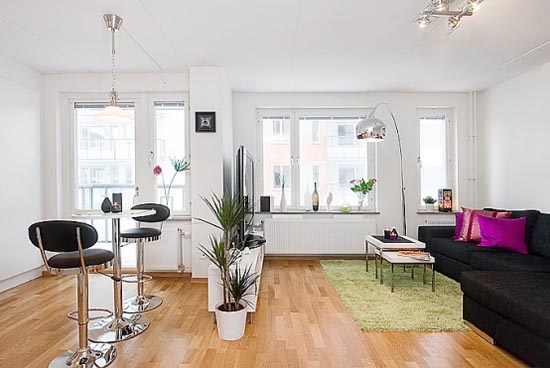
Out of all the different dwellings I have thus lived in so far I can honestly say that the most interesting dwelling to live in and to decorate were the one-bedroom flats, or studios or bachelor units (whatever you want to call them). So often people believe that bigger is better and maybe in some other areas in life this may be true but in the case of dwellings I would have to disagree. Living in a small space is not only convenient but allows you to use your imagination when decorating, whether it is creating false walls via bookcases, trying to figure out smart ways to store items or finding the best way to build up vertically in a chic manner. 

So here's to small spaces! And if you find that you just can't think of anything for your small space, just look at these inspiring pictures.

*THE NOT-SO-TYPICAL SMALL SPACE*

This space isn't exactly the typical "small" space we speak of but it is a one room flat none-the-less and does deserve it's due credit. Making use of the height of the wall as storage space for books is not only smart but also creates a unique-vibe to the living quarter.


*LIGHTNESS & WHITE*

One of the tricks to creating the illusion of a more open and airy space... lightness & white.


*RUSTIC COMFORT*

Making it comfy and homey is not entirely out of the question. More likely than not you're at an advantage when it comes to these two characteristics when dealing with smaller spaces, much of this has to do with the fact that you have less space to fill which means you're already half way there! 


*THE MINIMAL*

Contemporary and minimal is a smart way to go. As we all know the tidier a space the more room available. 


*BUILDING UPWARDS*

One of the smartest and fun ways to go when it comes to making the most out of a small space is to build... upwards! This often means lofted beds!


Using Green


I find the color green to be an eccentric color. A color that can be used for only a few rooms in the home, a color that must be well thought out in terms of interior planning when being used. I find that when using the color green things can go horribly wrong in one swift turn and because of this green is a rather hard color to stand firmly by. But for those who know what they're doing with their greens the overall look comes out astonishingly fresh and unique.

My hunt to find beautiful green-colored and/or hued rooms was not easy and in the end I found that the color green was best reserved for living-rooms and kitchens.


LIVING ROOMS

The room (Pictured above) plays off the eccentricity of the color green and so accessorizes the color with an eclectic mix of decor and furnishing.

Green-yellow can be refreshing and light and is made even more so (pictured above) with the abundance of natural light and spring colored furnishings.

The key-lime green below is also refreshing and light, however in this room (pictured below) the fresh and lightness of the key-lime green is taken down a few notches for a more earthy take by pairing it with darker olive greens. A smart play in different hued greens.

An olive green is used in the room (pictured above) to give color to a minimal modern home. The olive green adds color but the muted characteristic of the olive-hue does well to keep to the minimalism of the home.

A bright green is awakening, honest and full of happiness, paired with a large green-friendly yellow mural only makes it more-so. 

 And of course we can't forget the importance and the impact of using green hues via accent color. The largely neutral room accented with green allows the green to be the center of attention.


KITCHENS


I found that the green utilized in the kitchen was much more fun than looking at any other green-hued rooms. The green kitchens exuded fun, excitement and adventure, which is exactly what cooking is, in this way green is the perfect color for the kitchen.

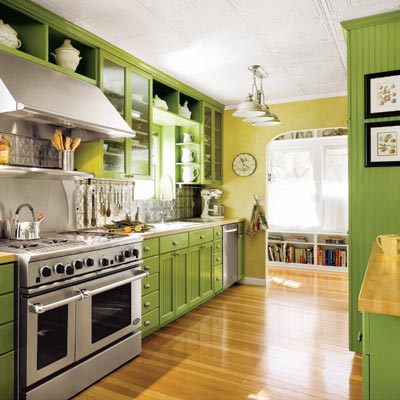
The light olive-hued cabinetry of the kitchen (pictured above) is accented by the yellow and white dinner and serving-ware. A homeliness and fun atmosphere is created with an overall chic-vibe lent by the carefully planned paring of the cabinets and all other yellow and white wares.

The true green (as pictured above) is hard to use in most rooms, but this kitchen has done well utilizing the true green with egg-shell colored walls and wood countertops.  

A more rustic use of green (as pictured above) uses olive green accented with woods trim and olive green tiles on the wall. The open shelving only adds to the rustic theme of the kitchen while the olive green, a largely toned-down green is the perfect green hue for a rustic kitchen, you can practically smell a bunch of sage lying around while a rabbit stew is cooking on the stove!

And for a rustic country theme add a lighter-toned green along with the olive green. Adding touches of distressed marks can only drive the theme home.


A more contemporary use of the color green is the green yellow-hue paired with dark wood floors and stainless silver appliances. 

Another example of using green in a contemporary kitchen (as seen below)? A kitchen accent wall compiled of green tiles, and to take that green to the next level? Add green accent colors throughout the kitchen.


I Stand Behind: Mr. Clean's Magic Eraser sponge


If cleaning was easy then we really wouldn't mind doing it but let's face it, no matter how lazy we are and how dirty our surroundings are day-to-day we all love to be living in a clean and tidy home. There are a few house chores I find rather easy and don't mind doing, such as loading the dish washer, doing laundry or even taking out the trash. But when it comes to cleaning sinks... let's just say I let it go... and go... and go, until it gets quite gross, I suppose deep down I'm hoping for my handy dandy husband to do it but of course he doesn't, and why should he? He already cleans the toilets (which I will never agree to do for as long as I live).

It seems that pregnancy has gotten me even lazier than I was before, I can't seem to stand the thought of scrubbing, soaping and bleaching the sink until it's all a shiny porcelain white like the first time we installed it. However, with the laziness came a really great idea, the idea to use Mr. Clean's Magic Eraser sponge! I usually use the magic eraser sponge on walls, cabinets, doors and tiles where stains, dry drips of colored things and scuff marks are- and they do work awfully well on these, but I've never tried the magic eraser sponge to clean sinks before.  Of course, it worked... like... magic.


To use the sponge, simple wet and squeeze excess water out, then begin using on surfaces that need any removals of scuffs and food stains (or whatnot), you can pretty much use it on any surface (with the exception of probably raw wood). I've used it on doors, tile counter tops, walls, moldings, bassboards and cabinets.


BEFORE

It's quite embarrassing to show the state of my bathroom sink, yes, quite disgusting I know. I let the grime and dust really build-up around the sink fixtures and around the sink drain. I'd like to say I let it get this disgusting for the sake of this post... but honestly, I've just been really lazy.


AFTER

It took a total of about 5 minutes to clean the bathroom sink, I tackeld the fixtures, the drain, the sink basin and around the sink top edges. I'm not sure how the magic eraser sponge works but it worked much faster and easier in swiping away all the caked grossness without much force- this is in comparison to my usual sink cleaning routine which usually consists of some hard scrubbing with the soft side of a regular sponge and soap, and I never tackle the fixtures with the regular sponge as I find it never clears away the water spots but the magic eraser sponge did. So clean. So easy. So fast!


You can find Mr. Clean's Magic Eraser sponge at any supermarket but I find that it's a bit cheaper Home Depot and you can also find the pack of 4 there also (versus the smaller packs of 2 or 3 you find at the market). 


LinkWithin

Related Posts Plugin for WordPress, Blogger...